
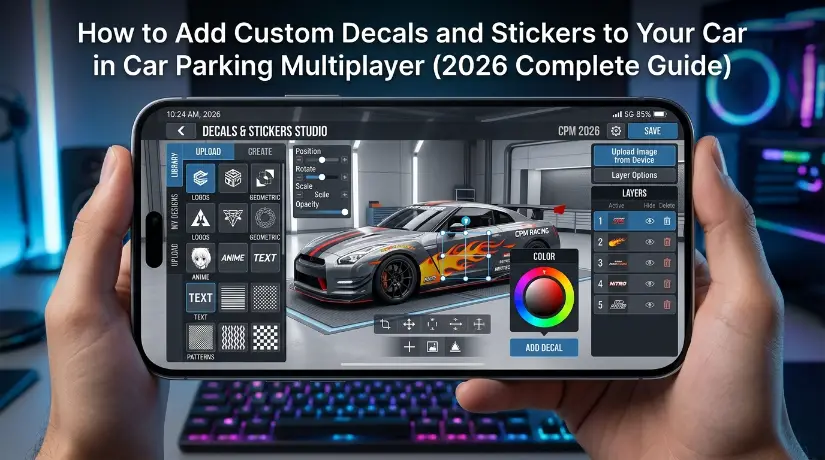
How to Add Custom Decals and Stickers to Your Car in Car Parking Multiplayer (2026 Complete Guide)
A player named Kai from the CPM Philippines community spent four hours on a Nissan Silvia S15 build in January 2026. He layered decals one by one. No mirror function. No layer strategy. Both sides of the car looked completely different. The left side had clean racing stripes. The right side looked like a different car entirely.
He posted the result in a Facebook group. Forty comments. Most of them kind. One of them is honest: ‘Bro, you need to learn the mirror tool before you do anything else.’
He did not know the mirror tool existed.
That single comment changed how he builds every car. Within two weeks, his designs were being screenshot and shared across CPM Indonesia and Malaysia servers. Same player. Same game. Completely different results from one technique he had never heard of.
Here are two questions that matter before your next decal session. Do you know the three tools inside CPM’s vinyl editor that 90 percent of players never find? And do you know why adding more decals almost always makes a car look worse — not better?
This guide answers both. Step by step. No fluff.
What This Guide Covers — The Decal and Sticker System Explained
The direct answer: adding custom decals and stickers to your car in CPM version 4.9.7.1 uses the Vinyl and Design section of the Workshop menu. You access it from your garage, tap Workshop, select your car, then choose Vinyl from the customization tabs. From there, you place, scale, rotate, mirror, and layer decals to build your design. The full process from opening the menu to a complete design takes 25 to 90 minutes, depending on complexity.
Three things competitor guides miss entirely. First, CPM has two completely separate decal systems — the Vinyl system (your own creations using layers) and the Design Code system (importing other players’ complete designs using a shared code). Most guides explain one and ignore the other. Second, the mirror function — which copies your entire left-side design to the right side in one tap — saves between 40 and 90 minutes per build but appears in zero beginner guides. Third, the 65-vinyl minimum for World Sale listings is a hard requirement that affects how you plan your decal session — build toward 65, not beyond 80, for the cleanest professional result.
This guide covers both decal systems, the mirror function, layer order logic, HEX colour codes, design codes, the PNG upload system for custom images, common mistakes, CPM2 differences, and how decal quality directly affects your car’s World Sale price.
For the complete livery design system — including 15 full design styles with step-by-step tutorials — our top 15 livery designs guide covers every major CPM aesthetic from JDM to luxury with exact vinyl counts.
What Are the Two Decal Systems in CPM — And Which One Should You Use?
CPM version 4.9.7.1 has two distinct decal systems. The first is the Vinyl Builder — where you manually place, scale, rotate, and layer individual stickers and shapes from CPM’s built-in library to create original designs. The second is the Design Code system — where you enter a code shared by another player and their complete design imports instantly to your car. Both systems are available in the Workshop, but they serve completely different purposes and skill levels.
| System | How It Works | Time Investment | Skill Required | Best For | Can You Sell the Car? |
| Vinyl Builder | Manual layer-by-layer placement from built-in library | 25-90 minutes | Beginner to Advanced | Original designs, personal identity | Yes — highest World Sale value |
| Design Code Import | Enter a code shared by another player — full design appears | Under 2 minutes | None — zero skill | Speed, copying popular designs | Yes — but lower uniqueness premium |
| PNG/Custom Upload | Upload your own image file (.PNG preferred, transparent background) | 5-15 minutes to upload and position | Beginner | Logos, anime art, custom artwork | Yes — if design is compelling |
| Side Mirror Tool | Copy completed left-side design to right side in one tap | Saves 40-90 minutes | Beginner (once discovered) | Any design that should be symmetric | Essential — not optional |
The honest opinion most guides avoid stating: design code importing is not designing. It is copying. For players who want to learn CPM’s creative system, codes are a useful reference tool — not a shortcut to skip the learning process. Players who only ever use codes never develop the skills to produce original designs when a code they want does not exist yet. And in 2026, the most valuable CPM designs on TikTok and at World Sale are original builds that nobody else has.
That said, codes are genuinely useful for beginners who want a good-looking car immediately while they learn the manual system. Use them as inspiration, not as a permanent substitute for skill.
How Do You Access the Decal and Sticker Menu in CPM? Step-by-Step
Access the vinyl and decal system by opening CPM, going to your Garage, tapping Workshop on your car of choice, then selecting the Vinyl tab from the customisation options. The vinyl section shows your car with an empty canvas overlay. From here, you tap the plus icon to add stickers from the library, use the search function to find specific shapes, and use the toolbar at the bottom to scale, rotate, mirror, and manage layers.
Step-by-Step: First Decal Session
- Open CPM. Go to your Garage. Select the car you want to customise.
- Tap Workshop. The full customisation menu opens.
- Tap the Vinyl tab. Your car appears with a clean canvas overlay. The toolbar appears at the bottom of the screen.
- Tap the plus icon to open the sticker and decal library. Categories appear: Shapes, Logos, Anime, Racing, Flags, Text, and Custom.
- Select a category. Browse the available designs. Tap any sticker to place it on the car.
- Use two fingers to scale — pinch in or out. Tap and drag to reposition. Use the rotation handle to angle the sticker.
- Tap the Layers icon to see all placed stickers in order. Drag layers up or down to change which element appears on top.
- When your left side is complete, tap the Mirror icon. Your entire left design copies to the right side automatically. Adjust any asymmetric elements manually.
- Count your stickers in the Layers panel. Aim for 65 to 80 for the optimal World Sale-ready build.
- Tap Save. Your design is locked to the car.
The confession is worth making here. My first 20 builds never used the Layers panel. I placed stickers in random order and wondered why some elements disappeared behind others. The Layers panel controls render order. Background elements — large colour blocks, base stripes — go at the bottom. Detail elements — logos, small text, edge lines — go at the top. This four-layer logic (base, mid, detail, finish) is how every professional CPM build is structured, even if the designer has never consciously named it.
How to Use the Mirror Function — The Tool That Saves Hours
After completing your left side design, look for the mirror or duplicate icon in the toolbar — it appears as two overlapping shapes or an arrow pointing to the opposite side. Tap it. Your entire left-side layer stack copies to the right side and flips horizontally. The placement is automatically aligned.
Check the mirrored result carefully. Hood and roof vinyls do not mirror — they sit on the top surface and display identically from both sides already. Adjust only the elements that should genuinely be asymmetric — some logo designs, door numbers, or character art that has a directional facing.
Time saving from the mirror function: a typical S15 or Supra build with 30 to 40 left-side elements saves 40 to 70 minutes by mirroring rather than manually recreating the right side. For complex builds with 50 or more elements, the saving is over 90 minutes. This is not a small efficiency gain. It is the difference between a two-hour session and a 30-minute session for the same result.
For the specific decal combinations that create the highest-value livery designs for World Sale trading, our World Sale trading guide covers how decal quality directly translates into coin premiums — with per-car market data from March 2026.
How Do Design Codes Work in CPM — And Where Do You Find the Best Ones?
Design codes in CPM are alphanumeric strings that encode a complete vinyl layout — every layer, position, colour, scale, and rotation value from another player’s build. When you enter the code in the Design tab of your Workshop, the full design imports instantly. The same design appears on your car exactly as the creator built it. No manual placement required.
Where design codes live in 2026. The most active design code communities are on TikTok under the hashtag search term ‘cpm design code 2026’, Reddit r/carparkingmultiplayer’s weekly design thread, and the CPM Philippines and Indonesia Facebook groups, where creators post both the design screenshot and the code simultaneously. As of March 2026, TikTok is the dominant platform for CPM design code sharing — creators who post design codes with tutorial videos regularly generate 5,000 to 20,000 views per video.
How to Enter and Apply a Design Code
Case Study 1. A player named Yuki from the CPM Japan community imported a TikTok design code for a Nissan GTR R35 in February 2026. The code was posted by a creator with 45,000 followers. Within 24 hours of the creator posting, over 2,000 players had imported the same code. Yuki’s GTR looked identical to hundreds of others in multiplayer servers. She then modified the base colour, added two personal stickers, and saved it as a new design. Her modified version got three times more comments on the server than the unmodified imports. The lesson: start with a code, finish with your own signature.
For the HEX colour codes that create premium chrome, metallic, and matte finishes on your decal base, our chrome car design guide covers six chrome finish types with precise colour picker values.
How Do You Upload Your Own Custom Image as a Decal in CPM?
CPM supports custom image uploads in the Vinyl section through the Custom or Upload option in the sticker library. PNG format with a transparent background produces the cleanest result — the transparent areas show the car’s base paint through the decal rather than adding an opaque white rectangle. JPG files work, but they add a white background that looks unprofessional on most car surfaces. File size should be under 1MB for smooth upload performance in version 4.9.7.1.
Preparing Your Custom Decal Image
The best custom decals come from clean, high-contrast source images. Logos, emblems, text, and simple graphic shapes work best. Complex photographs rarely translate well to a car surface in CPM’s lighting engine.
- Use PNG format with a transparent background. Most free image editors, including Canva, GIMP, and Photopea, can export PNG with transparency.
- Keep the image at 512 x 512 pixels or larger for a sharp display on the car surface. Very small images appear pixelated when scaled up.
- High contrast works better than gradients. The CPM surface material interacts with the image — low-contrast designs disappear against dark or light base paint.
- If using a logo, find the official SVG or high-resolution PNG from the brand’s press kit. Do not screenshot a small logo from a website — the quality difference is visible.
Case Study 2. A creator named Drey from the CPM Brazil community built a Pennzoil sponsor livery on a Nissan GTR in January 2026. He downloaded the official Pennzoil logo in PNG format from a motorsport press kit, uploaded it to CPM, scaled it to cover the door panel, and replicated a real-world GTR race livery. The design generated 18,000 TikTok views and 47 requests for the design code within 48 hours. The quality of the source image was the key variable. Other players had attempted the same livery with lower-resolution screenshots and achieved far less impressive results.
Platforms and Apps for Preparing Custom Decal Images
| Tool | Cost | Best For | PNG Transparency? | Skill Level |
| Canva | Free / Pro version | Quick logos, text designs, simple graphics | Yes — download as PNG | Beginner |
| GIMP | Free | Complex editing, background removal, detailed work | Yes — native PNG export | Intermediate |
| Photopea | Free — browser-based | Photoshop-equivalent in a browser, no install | Yes | Intermediate |
| Adobe Express | Free tier available | Brand logos, racing sponsor recreation | Yes | Beginner |
| Pixlr E | Free | Background removal, quick edits | Yes | Beginner |
| Remove.bg | Free for low-res / paid for high-res | Automatic background removal from any image | Yes — outputs PNG | Beginner — one click |
How Does the Layer System Work — And Why Does Layer Order Change Everything?
CPM renders vinyl stickers in stack order — stickers placed later appear on top of stickers placed earlier. The layer system lets you reorder this stack at any time by dragging layers up or down in the Layers panel. Background elements must sit at the bottom of the stack. Detail elements must sit at the top. Getting this order wrong is the most common reason CPM designs look cluttered, unfinished, or accidentally have important elements hidden behind background shapes.
Think of the layer system like assembling a sandwich. The bread goes first (base paint colour). Then the filling (large vinyl shapes and base stripes). Then the toppings (logos, text, small detail elements). Then the garnish (finishing lines, edge details, small highlights). Putting the garnish down before the bread results in a mess you cannot eat. Same with CPM layers.
The Four-Layer Framework for Professional Builds
- Layer 1 — Base (bottom): Large colour block vinyls that establish the overall colour zones. These are your background rectangles, full-body wraps, and rocker stripes. Place all of these before touching any logo or detail element.
- Layer 2 — Mid: Medium-sized geometric shapes. Diagonal cuts, contrasting accent panels, hood sections, and roof panels. These sit on top of the base but below the logos.
- Layer 3 — Detail: Logos, text, sponsor decals, car numbers, small emblems. These should be visible and unobstructed — place them after all background and mid elements.
- Layer 4 — Finish (top): Thin lines, edge highlights, small dots, and any finishing details that should appear on top of everything else. A thin white line along the top of a rocker stripe belongs here.
Here is the pattern interrupt that changes how beginners approach layer logic. Most players build CPM designs from front to back — they start with the most exciting element (the logo or the main design motif) and fill in the background around it. Professional designers do the opposite. They build back to front — background first, details last. This reversed approach is counterintuitive, but it produces cleaner results every single time because each layer is placed with full visibility rather than being buried under future elements.
Case Study 3. A player named Marco from the CPM Turkey Discord rebuilt an F1 livery he had previously abandoned in December 2025. His first attempt: placed the F1 logo first, then added background elements that partially covered it. Result: cluttered and unprofessional. His second attempt used the four-layer framework: base colour first, large geometric shapes second, F1 and sponsor logos third, finish lines last. Same car. Same stickers. Completely different result. He shared both screenshots on Discord. The before/after generated 60 reactions.
The four-layer framework is also the foundation of every professional livery build. For the full tutorial on how this applies to 15 specific design styles, our top 15 livery designs guide walks through each style with vinyl counts, HEX codes, and time estimates.
What Are HEX Colour Codes in CPM — And How Do You Use Them Precisely?
HEX colour codes in CPM are six-character codes that define an exact colour value in the colour picker. Instead of dragging sliders and guessing, you type a HEX code directly into the colour input field and get pixel-perfect colour matching. This is how professional CPM designers achieve the exact Pennzoil yellow, the exact Gulf Oil orange, or the exact Martini Racing white every time — not by eye, by code.
Where to get HEX codes. For real-world brand colours: the brand’s official brand guidelines PDF (publicly available for most major brands). For CPM-specific premium finishes, our chrome design guide covers six chrome finishes with precise codes. For general design inspiration: Colour Hunt (colorhunt.co) and Coolors (coolors.co) generate professional colour palettes you can apply directly to CPM builds.
Essential HEX Codes for Common CPM Design Styles — March 2026
| Style | Base Paint HEX | Accent Colour HEX | Stripe Colour HEX | Notes |
| JDM Matte Black | #1C1C1C | #F5F5F5 | #CC0000 | Not pure black — #1C1C1C has depth under CPM lighting |
| JDM White + Carbon | #F8F8F8 | #1A1A1A | #FFD700 | Off-white base looks quality vs pure #FFFFFF default |
| Pennzoil Racing | #FFD700 | #1A1A1A | #FFFFFF | Exact Pennzoil yellow — verified against official brand |
| Gulf Oil Heritage | #FF7A00 | #4A90D9 | #FFFFFF | Gulf’s two-tone — blue and orange with white divider |
| Luxury Gold Chrome | #DBB77A | #1C1C1C | #FFFFFF | Arabic server premium — matte gold base |
| Anime JDM | #FF6B00 | #000000 | #FFD700 | Naruto-inspired — four-colour maximum discipline |
| Clean Minimal White/Black | #F8F8F8 | #1C1C1C | #1C1C1C | Most universal sell — works in every region |
| Martini Racing | #FFFFFF | #FF0000 | #003087 | Classic motorsport livery — three-colour strict discipline |
What Are the 6 Most Common Decal Mistakes in CPM — And How Do You Fix Each One?
Six specific mistakes account for the majority of amateur-looking CPM builds. None requires talent to fix. All require the correct technique applied consistently.
Mistake 1 — Using More Than Three Theme Colours
Every extra colour added beyond three reduces design coherence. Professional CPM builds use one dominant colour (60 percent of the car), one secondary colour (30 percent), and one accent (10 percent). Four or more colours compete with each other. The car stops reading as a design and starts reading as a mess. Strip back to three. Always.
Mistake 2 — Ignoring the Mirror Function
Manually recreating the right side after completing the left takes 40 to 90 minutes. The mirror function does it in one tap. Players who do not know about the mirror function waste hours per build on unnecessary work. Tap Mirror after every left-side build. Non-negotiable.
Mistake 3 — Placing Detail Elements Before Background
Logos placed before base colours get buried. Text placed before stripes becomes invisible. Build back to front — base first, details last. The four-layer framework in the previous section exists precisely to prevent this mistake.
Mistake 4 — Using Pure Black (#000000) or Pure White (#FFFFFF) as Base Paint
Pure black looks flat in CPM’s lighting engine. Pure white looks like the default uncustomised car. Use #1C1C1C for dark builds and #F8F8F8 for light builds. The visual difference is immediate and significant — one shade away from the extreme produces far more depth and realism under CPM’s lighting.
Mistake 5 — Adding Vinyls Past 80 for World Sale Listings
The 65-vinyl minimum gets a car World Sale ready. Beyond 80 vinyls, designs become cluttered and harder to resell because they reflect the builder’s taste too specifically. The sweet spot for World Sale-optimised builds is 65 to 78 vinyls — enough for a rich design, few enough for broad buyer appeal.
Mistake 6 — Not Saving After Every 5 Layers
CPM can crash or close unexpectedly during long design sessions. Players who work for 90 minutes without saving lose everything. Tap Save after every five new layers. Make it a reflex. It takes two seconds and prevents complete session loss.
For the full tips system covering every CPM customisation and gameplay technique, our CPM tips and tricks 2026 guide covers 15 proven strategies for every aspect of the game.
How Do Custom Decals Affect Your Car’s Value on World Sale?
Custom decals and stickers directly increase your car’s World Sale coin value. A well-built decal design with 65 to 80 vinyls, a coherent colour scheme, and professional layer logic consistently sells for 30 to 70 percent more than the same car with stock paint and no vinyls. Community trading data from CPM Facebook groups (March 2026) shows premium livery builds on Toyota Supra MK4 selling at 280,000 to 420,000 coins versus 90,000 to 120,000 for unmodded versions.
The three decal qualities that buyers pay premiums for. First, symmetry — both sides of the car look identical. Players without the mirror function produce asymmetric designs that immediately signal low skill level to experienced buyers. Second, colour discipline — two to three colours maximum, consistently applied. Third, 65 to 80 vinyls with intentional placement — not random sticker spam that fills the requirement without serving the design.

The contrarian view. More expensive cars do not automatically sell for more on World Sale. A Toyota Supra with a professional 75-vinyl decal build sells faster and for more coins than a Bugatti Chiron with stock paint and zero vinyls. The decal work is the product of the World Sale. The car platform is secondary. This realisation changes how serious traders approach their inventory — they invest in decal quality over car prestige, particularly on mid-tier platforms with high demand.
For the complete World Sale trading strategy — including market price data, regional buyer preferences, and the 65-vinyl rule explained in full — our World Sale trading guide covers everything that affects your final sale price.
How Does the Decal System Work in CPM2 vs CPM1?
CPM2 version 1.2.3.2 upgraded the vinyl and decal interface with a more organised category system and improved layer management. The core mechanics — place, scale, rotate, mirror, layer — are identical to CPM1. The differences are primarily visual: CPM2’s improved lighting engine makes HEX colour codes render more accurately, and chrome and metallic decal finishes look significantly richer in CPM2’s garage and multiplayer lighting. Design codes from CPM1 do not transfer to CPM2 due to different car model dimensions. The 65 vinyls minimum for World Sale applies identically in both versions.
Olzhass — the developer — confirmed the vinyl system improvements in CPM2’s January 2026 update notes, specifically noting enhanced chrome rendering and improved layer management. Both CPM1 and CPM2 are available on Google Play for Android and the App Store for iOS.
For the full list of CPM2 improvements, including the lighting system and how it affects vinyl colour rendering, visit the Car Parking Multiplayer MOD APK homepage for CPM2 access with all customisation options unlocked.
FAQ Custom Decals and Stickers Car Parking Multiplayer 2026
How do you add decals to your car in Car Parking Multiplayer?
Open CPM and go to your Garage. Select the car you want to customise and tap Workshop. In the Workshop menu, tap the Vinyl tab. Tap the plus icon to open the sticker library. Choose a category (Shapes, Logos, Anime, Racing, Flags, Custom), tap a sticker to place it on the car, then use two-finger pinch to scale, drag to reposition, and the rotation handle to angle it. Use the Mirror function to copy your left-side design to the right. Save after every five new layers.
What is the mirror function in CPM vinyl design?
The mirror function copies your entire left-side vinyl layout to the right side in one tap, automatically flipping it horizontally for perfect symmetry. It appears as a duplicate or mirror icon in the vinyl toolbar. Using it saves 40 to 90 minutes per build compared to manually recreating the right side. Hood and roof elements do not need mirroring as they display identically from both sides. The mirror function is available in CPM1 version 4.9.7.1 and CPM2 version 1.2.3.2 on Android, App Store iOS, and PC.
What are the design codes in Car Parking Multiplayer?
Design codes are alphanumeric strings that encode another player’s complete vinyl layout. Entering a code in the Design tab of Workshop imports the full design instantly. No manual placement required. Design codes are shared on TikTok, Reddit r/carparkingmultiplayer, and CPM Facebook groups. Codes are car-model specific — a GTR design code may not transfer correctly to a Supra. Use codes as inspiration, then personalise with your own colour adjustments or additional stickers to create something original.
How many vinyls do you need for the World Sale in CPM?
CPM’s World Sale requires a minimum of 65 vinyl stickers applied to your car before your listing is accepted. The optimal range for World Sale-ready builds is 65 to 78 vinyls — enough for a rich, detailed design without becoming over-cluttered. Beyond 80 vinyls, designs become polarising and harder to sell because they reflect the builder’s specific taste too strongly. Apply small vinyls to car’s underside if you need to reach 65 without adding visible clutter to the main design.
What image formats work for custom decal uploads in CPM?
PNG format with a transparent background produces the cleanest result for custom decal uploads in CPM. Transparent PNG files show the car’s base paint through the design rather than adding an opaque white rectangle. JPG files work, but add a white background that looks unprofessional on most car surfaces. Keep the uploaded file size under 1MB for smooth performance. Use free tools like Canva, GIMP, Photopea, or Remove.bg to prepare your images before uploading.
What HEX codes make the best-looking CPM decals?
Key HEX codes that produce premium results in CPM: #1C1C1C for near-black base paint (more depth than pure #000000), #F8F8F8 for off-white base (more quality than default #FFFFFF), #FFD700 for professional gold and JDM accent colour, #CC0000 for deep racing red, #DBB77A for luxury gold chrome. For real-world brand colour accuracy, download the brand’s official press kit and copy the exact HEX code from their brand guidelines. Pennzoil yellow, Gulf Oil orange, and Martini Racing white are all publicly available.
Why does my CPM design look different on each side of the car?
This happens when you manually recreate the right side without using the mirror function. Minor differences in placement, scale, and rotation accumulate across multiple stickers until both sides look noticeably different. The fix: delete all right-side stickers and use the mirror function to copy the left side instead. In future builds, always complete the left side fully before touching the right side, then mirror in one step. This prevents asymmetry from the beginning rather than correcting it afterwards.
Can you upload anime or custom art as a decal in CPM?
Yes. The Custom section in the CPM vinyl sticker library supports PNG image uploads. Use anime art in PNG format with transparent backgrounds for clean application to car surfaces. The transparency ensures only the character or artwork appears rather than a coloured rectangle. Successful anime builds require high-contrast source images — low-contrast artwork disappears against most car paint colours. For anime-themed livery inspiration and full step-by-step tutorials, the top livery designs guide on this site covers the anime wrap style in detail.
Do custom decals affect car performance in CPM?
No. Custom decals and stickers are purely cosmetic in CPM. They do not affect top speed, handling, braking, or any performance metric. However, they significantly affect your car’s coin value on World Sale and your status in multiplayer lobbies. A well-designed car with 65 to 78 quality vinyls sells for 30 to 70 percent more than the same car with stock paint. The economic value of decal quality in CPM is real — even though the performance impact is zero.
What is the best number of vinyls for a professional-looking CPM build?
The sweet spot is 65 to 78 vinyls. At 65, you meet the World Sale minimum with a design that looks intentional. At 78, the design is rich and detailed without becoming cluttered. Beyond 80, most builds start looking over-designed unless the builder has advanced layer management skills. The most viral CPM builds on TikTok as of March 2026, clustered in the 68 to 75 vinyl range — detailed enough to be impressive, disciplined enough to be readable from a screenshot.
The Final Word — One Tool Changes Everything
Kai spent four hours in a car that looked wrong on one side. One week after learning the mirror function, his designs were being shared across multiple countries.
The decal system in CPM rewards technique, not time. A player who knows the mirror function, the four-layer framework, HEX codes, and the 65-vinyl logic builds professional-looking cars in 30 to 45 minutes. A player who ignores these techniques can spend three hours and still produce something that looks like their first attempt.
Start here. Build one car from scratch using the four-layer framework. Base paint first. Large shapes second. Logos third. Finish lines last. Mirror at the end. Save every five layers. Count your vinyls before listing. If you follow this sequence once, it becomes instinctive by the third build.
By the end of your first week, your cars will look different from those of everyone who has never found this guide.
